Plumbing terminology confuses many homeowners, and acronyms like FIP, MIP, and NPT add to the confusion. Understanding these terms helps you select correct fittings, communicate effectively with suppliers, and complete successful plumbing projects, suggests Skyline Property Management team.
- What Does FIP Mean in Plumbing?
- FIP vs MIP: Understanding the Difference
- Where FIP Fittings Are Commonly Used
- How to Identify FIP Threads on Your Pipes
- Choosing the Right FIP Fitting for Your Project
- Tools You’ll Need to Work with FIP Fittings
- Step-by-Step: Installing FIP Fittings
- Using Teflon Tape with FIP Connections
- Common FIP Fitting Problems and Solutions
- FIP Fitting Materials: Brass, Stainless, and PVC
- When to Upgrade or Replace FIP Fittings
- Professional Help: Finding a Plumber in Nashville
FIP fittings are fundamental components in residential plumbing systems, appearing in everything from water heaters to irrigation systems. Whether you’re replacing a fitting or planning a new installation, knowing how FIP connections work ensures leak-free results. For complex installations or if you’re uncertain about fitting compatibility, an experienced plumber in nashville provides expert guidance and professional installation. This comprehensive tutorial demystifies FIP fittings and teaches you everything needed to work with them confidently.
What Does FIP Mean in Plumbing?
FIP stands for Female Iron Pipe, a designation that describes threaded pipe connections used throughout plumbing systems.
The term “female” indicates threads on the inside of the fitting. Male fittings have external threads while female fittings have internal threads that accept male connections. This gender-based terminology is standard across all threaded connection systems.
“Iron Pipe” refers to the thread standard, not the fitting material. FIP threads follow specifications originally developed for iron pipes but now apply to brass, steel, plastic, and other materials. The term persists due to historical convention.
Thread specifications follow American National Standards Institute (ANSI) standards. FIP threads use the National Pipe Thread (NPT) standard, which creates tapered threads that seal through thread engagement and compression.
Taper angle distinguishes pipe threads from machine threads. NPT threads narrow at 1 degree 47 minutes along the thread axis. This taper allows threads to wedge together, creating both mechanical strength and a pressure seal.
The seal forms through thread interference. As you tighten a male NPT thread into a female FIP fitting, the tapered threads compress against each other. This mechanical interference blocks fluid passages.


FIP fittings appear throughout residential plumbing. Water heater connections, shutoff valves, faucet supply lines, washing machine hoses, and countless other applications use FIP threads. Understanding FIP helps you navigate hardware stores and complete repairs.
Alternative notation exists for the same fitting type. Some manufacturers label female threaded fittings as FPT (Female Pipe Thread) or FNPT (Female National Pipe Thread). These terms are interchangeable with FIP.
FIP vs MIP: Understanding the Difference
Distinguishing between FIP and MIP prevents purchasing wrong fittings and ensures successful connections.
MIP stands for Male Iron Pipe, describing fittings with external threads. While FIP has threads inside the fitting, MIP has threads on the outside. These complementary thread types connect to form sealed joints.
Thread engagement between MIP and FIP creates the seal. The male fitting’s tapered external threads screw into the female fitting’s tapered internal threads. Proper engagement requires sufficient thread depth.
Visual identification is straightforward once you understand the distinction. Look inside the fitting opening. If you see threads inside, it’s FIP. If threads are on the outside of the pipe or fitting, it’s MIP.
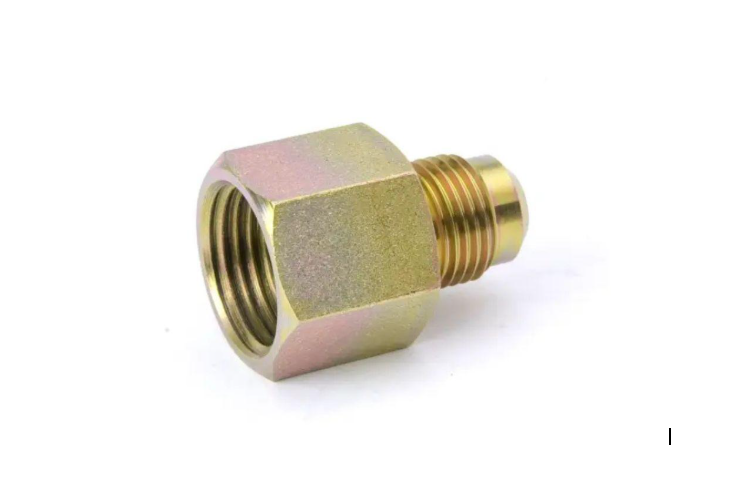
Adapter applications frequently use both FIP and MIP on different ends. A fitting might have FIP threads on one end to accept a male connection and MIP threads on the other to insert into a female connection.
Sizing conventions apply identically to both types. A 1/2-inch FIP fitting mates with a 1/2-inch MIP fitting. The nominal size doesn’t change based on thread gender.
Thread standards are identical between FIP and MIP. Both use NPT tapered threads with the same pitch and angle. The only difference is whether threads are internal or external.
Connection requirements remain consistent regardless of thread gender. Both FIP and MIP connections need thread sealant, proper tightening, and clean threads for leak-free operation.
Common confusion arises when trying to connect two FIP fittings or two MIP fittings directly. This doesn’t work since you need opposite thread genders. Use an adapter or coupling with appropriate threads on each end.
Where FIP Fittings Are Commonly Used
FIP fittings appear in numerous residential plumbing applications throughout your home.
Water heater connections extensively use FIP fittings. Cold water inlet and hot water outlet connections typically feature 3/4-inch FIP threads. Temperature and pressure relief valves also screw into FIP threaded openings.
Drain valves at the bottom of water heaters use FIP threads. These connections allow periodic tank draining for maintenance. Proper sealing prevents leaks that cause water damage.
Shutoff valves for fixtures and appliances feature FIP threads on the inlet side. Toilet shutoff valves, sink shutoffs, and main water shutoffs commonly use FIP connections to attach to supply pipes.
Faucet supply lines connect to FIP threads on shutoff valves. The flexible braided supply lines have MIP fittings that screw into valve FIP threads. This connection point frequently requires attention during faucet replacement.
Washing machine connections use FIP threads on hot and cold water valves. The machine’s supply hoses have MIP fittings that connect to these FIP valve threads. Proper sealing prevents flooding from loose connections.
Outdoor hose bibs incorporate FIP threads where they attach to supply pipes. The hose bib itself has MIP threads on the back that screw into FIP adapters or couplings on copper or PEX supply lines.
Water filtration systems mount using FIP connections for inlet and outlet ports. Whole-house filters, under-sink systems, and refrigerator filters often use FIP threads for easy installation and removal.
Pressure regulators in water supply systems feature FIP threads on both ends. These critical components reduce incoming water pressure to safe levels for household plumbing. Proper installation requires leak-free FIP connections.
Irrigation systems utilize FIP fittings extensively. Sprinkler valves, backflow preventers, and main line connections incorporate FIP threads. Understanding these connections helps maintain lawn irrigation systems.
How to Identify FIP Threads on Your Pipes
Recognizing FIP threads helps you purchase correct replacement parts and plan repairs effectively.
Visual inspection provides the most straightforward identification method. Look directly into the fitting opening. FIP threads appear as spiral grooves on the inside surface forming the connection.
Finger test confirms thread presence and location. Carefully run your finger inside the fitting opening. You’ll feel the ridges of internal threads in FIP fittings. Smooth interior surfaces indicate slip fittings, not threaded connections.
Thread pitch measurement helps identify size and type. Thread pitch gauges available at hardware stores match against thread patterns. NPT threads have specific pitches for each size.
Diameter measurement provides sizing information. Measure the fitting opening’s inside diameter with calipers. Remember that nominal size doesn’t equal actual diameter. A 1/2-inch FIP fitting has an actual inside diameter larger than 0.5 inches.
Taper detection distinguishes pipe threads from straight threads. Hold a straightedge against the threads. NPT threads visibly taper while straight threads maintain constant diameter. Pipe threads for FIP applications always taper.
Manufacturer markings sometimes indicate thread type. Quality fittings may be stamped with size and thread specifications. Look for markings like “1/2 FIP” or “3/4 NPT” embossed on the fitting body.
Thread depth measurement indicates how much thread is available. Measure from the fitting face to where threads end. Adequate thread depth ensures proper engagement with male fittings.
Compatibility testing using an appropriate MIP fitting verifies thread type. If a known NPT male fitting starts threading smoothly, you’ve confirmed FIP threads. Binding or resistance indicates wrong thread types.
Choosing the Right FIP Fitting for Your Project
Selecting appropriate fittings ensures compatibility, durability, and leak-free operation.
Material selection depends on your application and pipe type. Brass FIP fittings offer excellent durability for water systems and resist corrosion well. Stainless steel provides superior corrosion resistance for challenging environments.
PVC and CPVC FIP fittings work for plastic pipe systems. They’re lightweight, inexpensive, and easy to install. However, they’re less durable than metal and have temperature limitations.
Size matching is critical for proper fit. FIP fittings must match the pipe or male fitting size exactly. A 3/4-inch MIP thread requires a 3/4-inch FIP fitting. Attempting to force mismatched sizes damages threads.
Pressure rating ensures fittings handle your system’s operating pressure. Check the fitting’s maximum pressure rating and compare it to your system pressure. Most residential systems operate at 40-80 PSI, well within standard fitting ratings.
Temperature considerations matter for hot water applications. Standard brass fittings handle hot water easily. Plastic fittings have temperature limits; CPVC handles hot water while PVC is limited to cold water applications.
Application environment influences material choice. Outdoor applications need corrosion-resistant materials like brass or stainless steel. Underground installations benefit from brass or plastic materials that withstand soil contact.
Code compliance requirements vary by jurisdiction and application. Local plumbing codes may specify approved materials for different uses. Gas line fittings require special consideration and often mandate specific materials.
Quality assessment prevents premature failures. Inspect fittings for casting defects, rough threads, and proper dimensions. Quality fittings have smooth, precise threads and consistent dimensions.
Tools You’ll Need to Work with FIP Fittings
Proper tools make FIP fitting installation easier and more reliable.
Adjustable wrenches tighten and loosen FIP connections effectively. Two wrenches allow you to hold one fitting while turning the other, preventing pipe rotation. 8-inch and 10-inch wrenches handle most residential sizes.
Pipe wrenches provide maximum gripping power for stubborn connections. The serrated jaws bite into round surfaces for leverage. Use pipe wrenches on steel or brass; they damage soft materials like plastic.
Strap wrenches grip fittings without marring surfaces. The rubber strap wraps around the fitting and tightens as you pull the handle. Ideal for chrome fixtures, plastic fittings, and anywhere you want to avoid surface damage.
Thread tape or compound seals connections and prevents leaks. Keep both Teflon tape and pipe dope available. Tape works well for most applications while compound excels on larger fittings.
Thread cutting tools restore damaged threads or create new threaded connections. Pipe dies cut external threads while pipe taps cut internal threads. Most homeowners don’t need these, but they’re invaluable for repairs.
Deburring tools smooth pipe ends before threading. Burrs and rough edges damage threads during assembly. A simple deburring tool or file ensures clean pipe ends.
Thread gauges identify thread pitch and size accurately. These inexpensive tools eliminate guesswork when matching fittings. Thread pitch gauges confirm NPT specifications.
Inspection mirrors and flashlights help see connections in tight spaces. Many FIP fittings hide under sinks, behind appliances, or in dark crawl spaces. Good visibility prevents mistakes.
Step-by-Step: Installing FIP Fittings
Follow this systematic approach for leak-free FIP connections.
Preparation phase ensures success before assembly begins. Shut off water supply to the work area. Drain pipes by opening lowest faucets. Place buckets and towels to catch residual water.
Inspect and clean threads on both FIP and MIP components. Remove old sealant, debris, and corrosion using wire brushes. Damaged threads may prevent proper sealing and should be addressed.
Check thread condition carefully. Crossed, stripped, or badly corroded threads won’t seal reliably. Consider replacing compromised fittings rather than attempting repairs.
Apply thread sealant to male threads only. For Teflon tape, wrap 3-5 turns clockwise when viewing threads head-on. For pipe dope, apply a thin, even coat covering all threads except the first two.
Never apply sealant to female FIP threads. Sealing happens through compression of the male thread sealant. Compound in FIP threads creates mess without improving sealing.
Hand tighten first to ensure proper thread engagement. Start threading the male fitting into the FIP connection by hand. Threads should engage smoothly without forcing. Cross-threading causes damage and leaks.
If threads don’t start easily, don’t force them. Realign and try again. Forcing cross-threaded fittings destroys threads and ruins fittings.
Wrench tighten carefully for final sealing. Once hand-tight, use wrenches for final tightening. Apply firm pressure but avoid excessive force. Most connections seal with 1-2 additional turns beyond hand-tight.
Use two wrenches when possible to prevent pipe rotation. Hold the fitting or pipe stable with one wrench while tightening with the other. This prevents stress on other connections.
Test for leaks immediately after installation. Turn water on gradually and observe the connection. Look for drips, seeps, or spray. If leaks appear, tighten slightly more or disassemble and reapply sealant.
Using Teflon Tape with FIP Connections
Proper sealant application ensures leak-free FIP connections.
Tape selection matters for FIP applications. Standard white Teflon tape works for water connections. Yellow tape is necessary for gas lines. Match tape type to your specific application.
Application technique for FIP follows the same principles as any NPT threaded connection. Wrap tape clockwise on male threads in the direction of tightening. This prevents tape from unwrapping during assembly.
Wrap count typically requires 3-5 complete wraps around threads. Smaller threads need fewer wraps while larger threads benefit from more. The goal is filling thread valleys without preventing proper engagement.
Starting position should be the second or third thread from the end. Don’t wrap the very tip as this prevents smooth thread engagement. Overlap each wrap by 50% for complete coverage.
Tension control during wrapping prevents problems. Too much tension thins and weakens the tape. Too little allows bunching and gaps. Apply moderate, consistent tension throughout wrapping.
Smooth the tape after application by rubbing it firmly into threads. This presses tape into thread valleys and prevents edges from catching during assembly.
Immediate assembly works best. Apply tape and connect fittings promptly. Tape can collect dust or debris if left exposed for extended periods.
Pipe dope alternative works well with FIP connections. Some plumbers prefer paste thread compound, especially for larger pipes. The thick consistency fills gaps effectively and doesn’t require wrapping technique.
Combination approach uses both tape and dope for maximum sealing. Apply tape first, then brush a thin layer of pipe dope over it. This redundant sealing helps high-pressure or critical applications.
Common FIP Fitting Problems and Solutions
Understanding typical issues helps you troubleshoot and prevent failures.
Leaking connections rank as the most common FIP problem. Causes include insufficient sealant, damaged threads, improper tightening, or mismatched sizes. Address leaks by disassembling, inspecting components, and reassembling with fresh sealant.
Cross-threading damages both male and female threads. This occurs when fittings aren’t aligned properly during initial engagement. Always start threading by hand and ensure smooth engagement before applying wrench force.
If you suspect cross-threading, stop immediately. Disassemble and inspect threads for damage. Minor damage may file smooth while severe damage requires replacement.
Over-tightening cracks plastic fittings and can damage brass fittings. NPT threads seal through taper interference, not extreme torque. Tighten firmly but stop when resistance increases significantly.
Cracked plastic fittings must be replaced. No amount of sealant fixes structural damage. Use appropriate torque for plastic materials.
Seized connections from corrosion make disassembly difficult. Apply penetrating oil and allow time for penetration. Use proper-sized wrenches to avoid rounding hex flats. Heat can help metal fittings but damages plastic.
Mismatched threads prevent proper connection. NPT threads won’t mate with metric or other thread standards. Always verify thread compatibility before attempting assembly.
Insufficient thread engagement occurs when pipes are too short or fittings aren’t tightened adequately. NPT connections need minimum engagement depth for proper sealing. Ensure at least 4-5 threads engage for reliable connections.
Galling on stainless steel fittings occurs when similar metals bind during tightening. Use anti-seize compound on stainless connections to prevent galling. Take extra care when tightening stainless male threads into stainless FIP fittings.
FIP Fitting Materials: Brass, Stainless, and PVC
Different materials suit different applications and offer distinct advantages.
Brass FIP fittings dominate residential plumbing applications. The copper-zinc alloy resists corrosion well, machines easily for precise threads, and handles both hot and cold water. Brass fittings typically last decades in typical applications.
Lead-free brass is now standard for potable water applications. Older brass contained lead for machinability. Modern lead-free formulations meet current health standards while maintaining performance.
Cost sits in the middle range for FIP materials. Brass costs more than plastic but less than stainless steel. The durability justifies the price for most residential applications.
Stainless steel FIP fittings offer maximum corrosion resistance. They excel in marine environments, corrosive water conditions, and outdoor applications. Stainless maintains strength and appearance across wide temperature ranges.
Grade 304 stainless suits most residential applications. Grade 316 provides additional corrosion resistance for coastal areas or particularly corrosive environments. Verify the grade when purchasing for specific conditions.
Higher cost limits stainless steel to applications where its benefits justify the expense. Coastal homes, outdoor fixtures, and corrosive environments benefit most from stainless fittings.
PVC FIP fittings work for cold water applications and drain systems. They’re lightweight, inexpensive, and easy to install. However, they lack hot water capability and aren’t as durable as metal.
Schedule 40 PVC is standard for drain applications. Schedule 80 has thicker walls for higher pressure. Both types use NPT threads compatible with other FIP materials.
CPVC FIP fittings handle hot water that would damage PVC. The chlorinated variant maintains strength at elevated temperatures. CPVC appears tan or cream colored while PVC is white.
Temperature ratings distinguish CPVC from PVC. CPVC handles water up to 200°F while PVC degrades above 140°F. Always use CPVC for hot water supply lines.
Galvanized steel FIP fittings are less common in modern plumbing. They corrode over time, especially in water systems. Brass has largely replaced galvanized steel in new construction and renovations.
When to Upgrade or Replace FIP Fittings
Recognizing when replacement is necessary prevents failures and water damage.
Corrosion indicators suggest fittings have reached end of life. Green deposits on brass, rust on steel, or white mineral buildup indicate corrosion. Surface corrosion may be cosmetic but internal corrosion weakens fittings.
Flaking threads or rough surfaces indicate advanced corrosion. These fittings may leak or break during disassembly. Replace rather than attempt reuse.
Age considerations factor into replacement decisions. Brass fittings can last 50+ years but eventually corrode. If fittings are decades old and you’re working nearby, consider preventive replacement.
Galvanized steel fittings should be replaced proactively. They have limited lifespan and commonly fail after 30-40 years. Upgrade to brass or stainless during renovations.
Leaking history indicates fitting problems. Fittings that have leaked previously may have damaged threads or compromised sealing surfaces. Fresh sealant might work temporarily but replacement provides long-term reliability.
Thread damage from cross-threading, over-tightening, or tool damage prevents reliable sealing. Inspect threads carefully during disassembly. Damaged threads justify replacement even if fittings otherwise appear functional.
Material upgrades make sense during renovations. Replacing plastic fittings with brass improves durability. Upgrading to stainless steel in corrosive environments prevents future problems.
Code compliance may require upgrades. Building codes evolve, and older fittings may not meet current standards. Lead-free requirements mandate replacement of older brass fittings containing lead.
Accessibility considerations favor preventive replacement. If fittings will become difficult to access after renovation, replace them proactively rather than risking future leaks behind walls or under floors.
Professional Help: Finding a Plumber in Nashville
Knowing when and how to engage professional plumbing services ensures quality results.
Complex FIP assemblies involving multiple connections in tight spaces challenge DIY capabilities. Professional plumbers have experience, tools, and techniques that ensure proper installation.
Gas line work with yellow-taped FIP connections requires licensed professionals in most jurisdictions. Gas leaks create serious safety hazards. Code compliance and safety concerns mandate professional handling.
Permit requirements for significant plumbing work often specify licensed plumber installation. Major renovations, new construction, and work affecting main lines typically need permits that professionals obtain and manage.
Time constraints make professional service practical. Plumbers complete installations quickly with minimal disruption. DIY projects often stretch over days or weeks.
Warranty protection on fixtures and appliances may require professional installation. Check warranty terms before DIY installation. Professional work often carries additional labor warranties.
Licensing verification ensures competent service. Tennessee requires plumber licensing. Verify current licenses with the state board before hiring. Licensed plumbers maintain insurance and follow code requirements.
Multiple estimates help identify fair pricing. Contact several plumbers for quotes on the same work. Compare pricing, timelines, and approach. Extremely low bids may indicate corners being cut.
Reviews and references provide insight into service quality. Check Google reviews, Angie’s List, and Better Business Bureau ratings. Ask for references from similar projects.
Written agreements protect both parties. Get detailed written estimates including scope, materials, timeline, and payment terms. Written documentation prevents misunderstandings and provides recourse if problems arise.