With the advent of machines during the First Industrial Revolution, engraving gradually shifted from manual to mechanical operations. Compared to traditional manual engraving, mechanical engraving, powered by electricity or pneumatics, is more efficient and stable. Among the many engraving tools available, pneumatic engravers are increasingly popular among artisans and hobbyists due to their portability, stability, and ability to produce detailed engravings, making them an ideal entry-level tool for beginners. However, to fully utilize the advantages of a pneumatic engraving machine when engraving, it is crucial to have a thorough understanding of its various aspects. This guide will provide a deeper understanding of pneumatic engraving machines, covering their principles, usage tips, and a purchasing guide. Whether you’re a beginner or a professional craftsman striving for efficiency, you’ll find valuable references and practical tips here.
Basic Principles
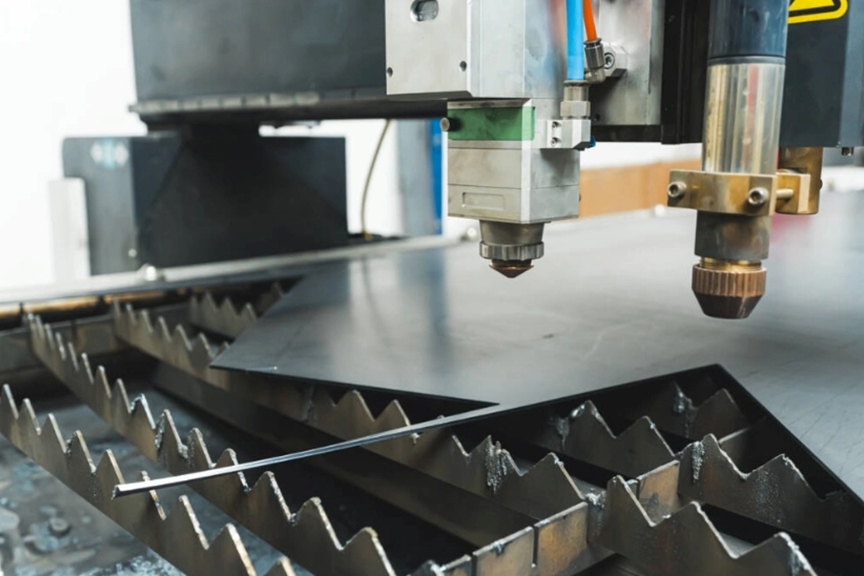
A pneumatic engraving machine primarily consists of an air motor, engraving head, compressed air system, control system, air filter, pneumatic connecting pipes, and accessories. Its basic principle is to filter out moisture, dust, and oil from the air in the air filter, thereby ensuring the quality of the compressed air. The compressed air system compresses the air, which is then converted into rotational force or reciprocating motion by the pneumatic motor, driving the engraving head to engrave, cut, or polish the material surface.
Usage Tips
Steps
The most important thing about using a machine is to master its basic steps. You can treat the following content as an instruction manual. Once you purchase a pneumatic engraving machine, you can quickly get started.
1 Check Equipment
Always inspect the equipment before operation, as this will not only affect the quality of the engraving but may also pose a safety hazard. First, check all parts of the pneumatic engraving machine to ensure they are intact. Check that the cutting tools are sharp, the air motor is not loose, the connecting pipes are secure, and the air compressor is operating properly. Ensure that the air filter is not clogged and clean it if necessary to ensure unobstructed airflow. Second, engraving in a clean, well-ventilated environment will minimize the entry of airborne impurities into the pneumatic system, which could affect the engraving effect.
2 Install
First, some pneumatic engraving machines require an additional air compressor connection. Find matching pipes and securely connect them. Some pneumatic engraving machines don’t require an air compressor, making them more convenient. Next, select the appropriate engraving tool and install it on the pneumatic engraving machine. For engraving tasks like wood, a coarser engraving tool is typically used; for finer details, a finer engraving tool head should be selected. Install the correspondingly sized tool on the pneumatic engraving machine’s cutter head. Tighten the tool with a wrench to ensure it does not loosen during the engraving process.
3 Adjust air pressure and engraving depth


The third step is to adjust the air pressure and engraving depth. This is a crucial step that affects the final engraving. Harder materials, such as quartz and metal, require higher air pressure, while softer materials, such as wood, require lower pressure. Choosing the right air pressure allows for more efficient and flawless engraving. For beginners, it’s a good idea to start with a lower pressure and gradually adjust it. Practice makes perfect, and you’ll find the right pressure every time. Also, pay attention to the engraving depth to avoid carving too deep in one go. When engraving shallow lines, set the tool depth lower, and vice versa.
4 Start Carving
After completing the preliminary preparations, press the start button or step on the foot pedal to activate the pneumatic engraving machine. Before beginning engraving, perform a test run using the foot pedal to ensure the machine’s smooth operation. Generally speaking, slower engraving speeds are suitable for fine details, while faster speeds are suitable for engraving larger areas. During engraving, beginners should ensure that the tool moves slowly and steadily, in accordance with the design, to avoid excessive speeds that may cause inaccuracies.
Pause the engraving process periodically to check the results and ensure the tool is not excessively worn or that the engraving depth is consistent. If any problems are detected, stop the machine immediately for inspection and adjustment. If the tool is loose, tighten it immediately with a wrench. If the engraving is unsatisfactory, adjust parameters such as air pressure, engraving depth, and engraving speed, then restart the engraving process. For complex engraving designs, engrave in sections to ensure quality at each stage.
5 Cleanup
After engraving, stop the pneumatic engraving machine and clean the tool and body with a clean cloth or air spray gun to remove any remaining dust and debris. For engraved workpieces, use a brush to remove any remaining powder. After each use, inspect the tool for wear or damage and replace it promptly. Inspect all parts of the pneumatic engraving machine to ensure they are not loose or damaged, and perform any necessary maintenance.
Machine Maintenance
As a precision engraving tool, proper maintenance is essential to extend its service life. However, compared with electric engraving machines, the maintenance and care of pneumatic engraving machines are much simpler.
1 Cleaning and Maintenance
First, regular cleaning is essential. After each use, clean the engraving machine promptly to remove dust, wood chips, metal shavings, and other residue. Use a clean cloth, brush, or air gun to clean, especially the cutting tool and pneumatic system components, to prevent dust and impurities from affecting the engraving results. Regularly clean the air filter inside the pneumatic engraving machine to ensure smooth airflow. A clogged filter can affect the machine’s proper operation and even damage the pneumatic system.
Second, tool maintenance is essential. Regularly inspect tools for wear and damage. Use a sharpening tool to properly condition tools to maintain sharp edges. Severely worn tools should be replaced promptly to ensure accurate engraving. Regularly check the air pressure regulating system to ensure that the air compressor and piping connections are secure and leak-free. Replace any aged or damaged piping. Keep the air compressor clean and in proper working order. Check the stability of the air pressure system to avoid airflow issues that could affect the engraving results.
Finally, regular lubrication and oiling are essential. Regularly lubricating the motor and pneumatic piston system of the pneumatic engraving machine reduces friction, improves efficiency, and prevents component wear. Always use the appropriate lubricant to avoid system failure due to oil incompatibility.
2 Storage and Preservation
Store the pneumatic engraving machine on a stable surface to avoid impacts or drops, which can damage delicate components and affect performance. When not in use, store the machine in a dry, clean area away from moisture and extreme temperatures. Moisture can cause rust on machine components and affect their operation. Even if the machine is not in use for an extended period, it should be periodically started and operated to maintain the flexibility of its internal components.
Buying Guide
If you’re ready to buy a pneumatic engraving machine, it will bring you a more efficient and convenient engraving experience. Here are some buying tips:
l Choose a model based on your needs. Woodcarving enthusiasts or beginners can opt for a lightweight pneumatic engraving machine. However, for those working with hard materials like stone and jade, or for professional craftsmen, higher air pressure, more stable output power, and the ability to operate continuously for extended periods of time are required. Therefore, when choosing a machine, consider whether it can handle high-load operation.
l Consider performance and configuration. Power and speed are key factors. Generally, professional craftsmen choose high-power, high-speed machines, while beginners can start with medium- to low-power models with adjustable speeds for easier control. Tool compatibility is also a key consideration when choosing a machine. A good pneumatic engraving machine should support a variety of tool types to accommodate different materials and designs.
Summary
Pneumatic engraving machines, with their stable pneumatic drive, efficient performance, and exceptional precision, have become a favorite among engraving enthusiasts. For beginners, choosing the right pneumatic engraving machine, mastering basic operation methods, and developing good maintenance habits are key to rapidly improving engraving skills. Whether you’re just getting started or pursuing advanced craftsmanship, this guide will help you better understand pneumatic engraving machines and make the most of them in your engraving work.