In the modern digital age, our “online presence” is often the first impression we make. Whether it’s a LinkedIn profile, a dating app, or a personal blog, the quality of our photos speaks volumes. But let’s face it: getting the perfect shot is hard. The lighting might be off, your hair might be having a “bad day,” or you might simply wish you were wearing a different outfit. In the past, you’d have to schedule a new photoshoot. Today, you have AI.
For the average user, the most effective workflow involves a two-step process. First, you establish the core identity of the photo using a Face Swap mechanism. This is incredibly useful if you have a photo where you look great, but the background or the body position is awkward. You can find a “template” photo that has the perfect pose and then “swap” your face onto it. Once the identity is established, the next logical step is to use an AI Photo Editor to refine the nuances. For example, after swapping your face into a new scene, the AI might have given you a hairstyle that doesn’t quite match your real-world look. A dedicated editor allows you to selectively modify the hair, adjust the sharpness of the eyes, or even change the color of your shirt to better suit your skin tone.
Breaking Down the Technology
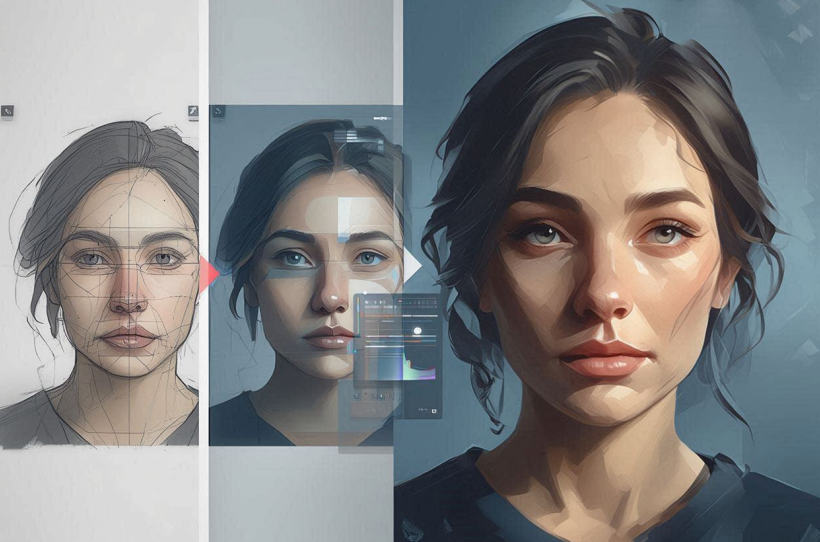
To use these tools effectively, it helps to understand a little bit about what’s happening “under the hood,” without getting bogged down in technical jargon. AI image editing is powered by something called “Generative AI.” Essentially, the computer has looked at millions of photos and learned what a human face looks like, how hair flows, and how light reflects off different surfaces.
When you perform a modification, the AI isn’t just cutting and pasting. It is “generating” new pixels that match the style and context of the image. This is why, when you use a tool to change your hair, the new hair doesn’t just sit on top of your head—it blends into your forehead and follows the shadows of your face.
A Practical Workflow for Everyone
If you’re new to this, here is a simple, effective workflow to get professional-looking results every time:
- Select Your Base: Choose a target image that has the “vibe” or professional look you want. This is the “body” of your final image.
- The Identity Shift: Use the Face Swap tool to bring your own face into that target image. Be sure to use a clear, front-facing photo of yourself for the best results.
- The Refinement Stage: Open the result in an AI Photo Editor. This is where the real magic happens. Look for any areas that look “digital” or “fake.”

- Hair and Features: If the swap changed your hairstyle too much, use a “Generative Fill” or “Inpaint” feature to describe your actual hairstyle. The AI will rewrite that section of the image.
Solving Common Photo Problems
AI isn’t just for total transformations; it’s also a powerful “fixer.” We’ve all had those photos where everything is perfect except for one small detail.
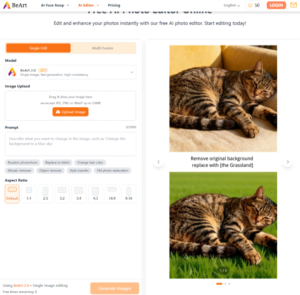
- The “Photobomb”: Use AI to remove people or objects from the background. The AI will look at what’s around the object and “guess” what should be behind it, filling the gap perfectly.
- Low Quality: If you have an old photo that is blurry or pixelated, AI “Upscalers” can add detail back in, making a 10-year-old phone photo look like it was taken on a modern DSLR.
- Lighting Fixes: If a photo is too dark, traditional editing often makes it look grainy. AI editing can “re-light” the scene, adding brightness while keeping the image crisp and clean.
The Power of Customization
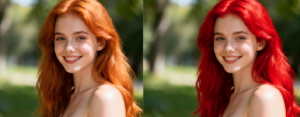
One of the biggest advantages of platforms like Beart.ai is the ability to customize. Unlike standard filters that apply the same look to everyone, AI editing is specific to you. You can tell the AI exactly what you want. Instead of a generic “glamour” filter, you can say “Keep my natural freckles but remove the shadow under my eyes.” This level of control ensures that you still look like you, just on your best day.
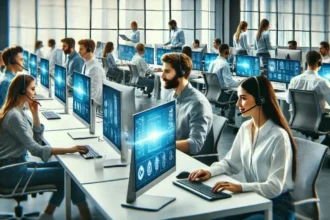
This technology is particularly transformative for people who need professional content but lack a big budget. A freelancer can create a series of high-quality marketing images for their website using nothing but a few selfies and a good AI toolset. It levels the playing field, allowing anyone to have “pro-level” visuals.
Staying Natural
A common fear with AI is that the photos will look “uncanny” or “fake.” To avoid this, the key is moderation. When using an editor to refine your features or hair, try to stay close to your actual appearance. Use the AI to enhance, not to erase. The most successful AI edits are the ones where nobody can tell that an AI was involved at all. They just think you had a great photographer and a very expensive camera.
Conclusion
Think of AI as a highly skilled digital assistant. It can do the tedious work of masking and blending, allowing you to focus on the creative direction. By mastering the sequence of using a swap for the foundation and an editor for the fine details like hair and lighting, you unlock a level of photographic quality that was previously impossible for the average person.
The tools available today are more powerful and user-friendly than ever before. Whether you’re looking to refresh your personal brand or just having fun with friends, AI image editing offers a world of possibilities. So, grab your favorite selfie, head over to an AI platform, and start exploring the future of photography today.