A properly installed range hood transforms your kitchen into a healthier, more comfortable cooking space while adding visual appeal to one of your home’s most important rooms. Beyond simply removing cooking odors, a well-functioning range hood eliminates harmful smoke, grease particles, and excess moisture that can damage your kitchen surfaces and compromise indoor air quality. Whether you’re renovating an existing kitchen or planning a new installation, understanding the fundamentals of range hood setup ensures you’ll breathe easier while cooking your favorite meals.
The installation process might seem daunting at first, but with the right knowledge and preparation, you can achieve professional results that enhance both function and style. From selecting the appropriate model for your cooking habits to ensuring proper ventilation and electrical connections, each step plays a crucial role in creating a bright, inviting kitchen environment. This comprehensive guide walks you through everything you need to know about range hood installation, helping you make informed decisions that will benefit your home for years to come.
Understanding Range Hoods
Range hoods are ventilation systems mounted above your cooktop or range, designed to capture and remove airborne contaminants produced during cooking. These appliances work by drawing in smoke, steam, grease particles, and odors through powerful fans, then either venting them outside through ductwork or filtering and recirculating the air back into your kitchen. The hood’s canopy extends over your cooking surface to effectively capture rising heat and pollutants at their source. Modern range hoods combine this essential function with attractive designs that complement your kitchen décor, serving as both a practical necessity and a focal point. By continuously removing cooking byproducts, they prevent grease buildup on cabinets and walls while maintaining fresher air throughout your home.
Types of Range Hoods
Ducted range hoods connect to external ductwork that channels contaminated air outside your home, providing the most effective ventilation by completely removing cooking pollutants from your living space. Ductless range hoods use charcoal filters to clean the air before recirculating it back into the kitchen, making them ideal for spaces where external venting isn’t feasible due to structural limitations or apartment regulations.
Choosing the Right Range Hood
Selecting the appropriate range hood requires careful consideration of several key factors that will affect both performance and satisfaction. Your budget establishes the baseline, but don’t sacrifice essential features for minor cost savings, as a quality hood protects your investment in kitchen finishes. Kitchen size and ceiling height determine the physical dimensions and CFM (cubic feet per minute) rating you’ll need—larger spaces with higher ceilings require more powerful ventilation to effectively capture cooking emissions. Consider your cooking style: frequent high-heat cooking or wok use demands higher CFM ratings and heat-resistant materials, while occasional light cooking allows for more modest specifications. The hood should extend at least three inches beyond your cooktop on each side for optimal capture efficiency, and noise levels matter significantly in open-plan homes where kitchen sounds travel freely into living areas.
Kitchen Air Quality and Health
The air quality in your kitchen directly affects your respiratory health and overall wellbeing, especially if you cook frequently or use high-heat methods that generate significant smoke and fumes. Cooking releases nitrogen dioxide, carbon monoxide, and fine particulate matter that can irritate airways, trigger asthma symptoms, and contribute to long-term respiratory issues when inhaled regularly. Gas stoves produce particularly concerning emissions even when not in use, while frying and grilling create grease-laden particles that settle throughout your home. A properly functioning range hood reduces these health risks by capturing pollutants before they spread, maintaining oxygen levels, and preventing the accumulation of harmful substances on surfaces where they can be re-released into the air. For households with children, elderly members, or anyone with respiratory sensitivities, effective kitchen ventilation becomes even more critical in protecting vulnerable individuals from cooking-related air quality degradation.
Installation Basics
Preparation
Begin by turning off the electrical circuit breaker that powers the installation area to ensure safe working conditions throughout the process. Clear your countertops and stovetop completely, removing any items that could interfere with your work or get damaged during installation. Measure the space above your range carefully, marking the exact center point where the hood will align with your cooktop. Gather all necessary tools including a drill, level, screwdrivers, wire strippers, and appropriate fasteners for your wall type. If installing a ducted model, verify that your ductwork route is clear and plan the path to minimize bends that reduce airflow efficiency. Have a helper available, as range hoods are heavy and awkward to position alone.
Mounting
Position the mounting bracket or template against the wall at the manufacturer’s recommended height, typically 24 to 30 inches above electric cooktops or 28 to 36 inches above gas ranges. Use a level to ensure the bracket sits perfectly horizontal, as even slight tilting affects both appearance and performance. Mark all screw holes clearly, then drill pilot holes appropriate for your wall material—drywall requires anchors, while studs provide direct support. Secure the mounting bracket firmly, checking that it can support the hood’s full weight without flexing. With your helper supporting the hood from below, lift it into position and attach it to the mounting bracket according to the specific instructions for your model. Double-check that the hood sits level from multiple angles before fully tightening all fasteners, making minor adjustments as needed to achieve perfect alignment with your cooktop.


Electrical Connections
Locate the electrical junction box in your installation area, ensuring it’s positioned where the hood’s wiring can reach without strain. Remove the appropriate knockout panel from the range hood housing to access the internal wiring compartment. Feed the household electrical cable through the knockout opening, securing it with the provided strain relief connector. Match wire colors carefully: connect black to black (hot), white to white (neutral), and green or bare copper to the ground wire, using wire nuts to secure each connection. Tuck all wires neatly into the junction box, ensuring no bare wire is exposed beyond the wire nuts. Replace the junction box cover and restore power only after completing all other installation steps.
Testing
Restore power at the circuit breaker and turn on the range hood at its lowest setting, listening for smooth motor operation without unusual rattling or grinding sounds. Gradually increase the fan speed through all settings, confirming that each level responds correctly and produces progressively stronger airflow. Hold a tissue or lightweight paper near the hood’s intake while the fan runs to verify adequate suction across the entire capture area. Test all lighting functions if your model includes built-in illumination, checking that bulbs operate properly and provide sufficient brightness over your cooking surface. For ducted installations, go outside to confirm air is exhausting freely through the exterior range hood vent without obstruction.
Stylish and Functional Design
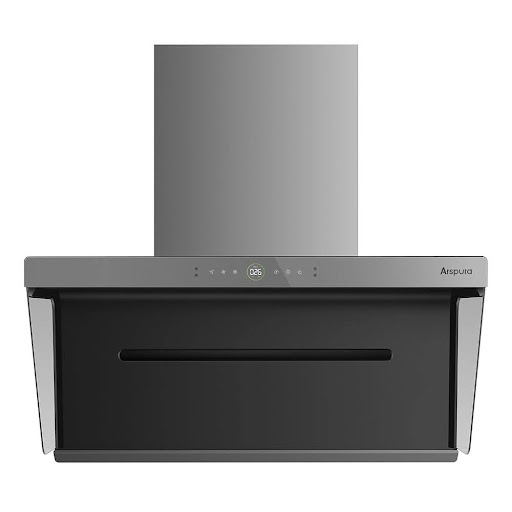
A range hood serves as both a practical appliance and a design statement that can elevate your kitchen’s visual appeal. Modern hoods come in diverse styles from sleek stainless steel to custom panel-ready designs that blend seamlessly with cabinetry, allowing you to match your kitchen’s aesthetic whether contemporary, traditional, or transitional. The hood’s finish and shape create a focal point above your cooking area, drawing the eye upward and adding architectural interest to what might otherwise be blank wall space. Consider how the hood’s profile complements your kitchen’s proportions—a bold statement piece works beautifully in spacious kitchens with high ceilings, while streamlined under-cabinet models suit compact spaces without overwhelming the room. Balancing form with function means selecting a visually appealing hood that still meets your ventilation requirements, ensuring your kitchen remains both beautiful and healthy.
Design Tips
Coordinate your range hood finish with other major appliances like your refrigerator and dishwasher to create a cohesive look throughout the kitchen. Choose a design that complements your kitchen layout by considering the hood’s visual weight relative to surrounding cabinetry and the overall balance of your space.
Energy Efficiency
Energy-efficient range hoods equipped with LED lighting and variable-speed motors significantly reduce electricity consumption compared to older models with incandescent bulbs and single-speed fans. Look for hoods with Energy Star certification or DC motors that deliver powerful ventilation while using less energy, translating to lower utility bills over the appliance’s lifespan. Programmable timers and automatic shut-off features prevent unnecessary operation, while efficient designs maximize airflow with minimal power draw. Investing in an energy-efficient model not only reduces your environmental footprint but also provides long-term savings that offset the initial purchase cost, making it a financially and ecologically sound choice for conscientious homeowners.
Maintenance and Cleaning
Regular maintenance keeps your range hood operating at peak efficiency and extends its lifespan significantly. Clean or replace grease filters monthly if you cook frequently, or every two to three months for lighter use—metal mesh filters can go in the dishwasher, while charcoal filters in ductless models need replacement rather than cleaning. Wipe down the hood’s exterior surfaces weekly with a damp cloth and mild degreaser to prevent buildup that becomes harder to remove over time. Inspect and clean the fan blades every few months by removing the filters and gently wiping accessible areas, as accumulated grease reduces airflow and strains the motor. Check ductwork annually for blockages or grease accumulation that restricts ventilation, and ensure exterior vents remain clear of debris like leaves or bird nests that impede proper exhaust flow. Many home supply retailers like Arspura offer specialized cleaning tools and replacement filters designed specifically for range hood maintenance, making it easier to keep your ventilation system in optimal condition.
Common Mistakes to Avoid
Installing a range hood too low creates a fire hazard and interferes with cooking, while mounting it too high reduces ventilation effectiveness by allowing pollutants to escape the capture zone. Undersizing the hood by choosing a model narrower than your cooktop leaves edges unprotected, allowing grease and smoke to bypass the ventilation system entirely. Neglecting to secure ductwork properly creates air leaks that reduce suction power and allow contaminated air to enter wall cavities. Using flexible duct with excessive bends restricts airflow dramatically, forcing the motor to work harder while delivering poor results. Failing to install a backdraft damper on exterior vents allows cold air, pests, and odors to enter your home when the hood isn’t running, negating the benefits of proper ventilation.
Creating a Healthier Kitchen Environment
Installing a range hood correctly transforms your kitchen into a healthier, more enjoyable space where you can cook with confidence knowing that harmful pollutants are being effectively removed. From understanding the differences between ducted and ductless systems to mastering the technical aspects of mounting, electrical connections, and testing, each step contributes to a successful installation that protects your home and family. The right range hood not only safeguards your respiratory health by eliminating cooking emissions but also preserves your kitchen’s surfaces from grease damage while adding a striking design element that enhances your home’s value.
By following the guidelines in this comprehensive guide, you’ve gained the knowledge to select, install, and maintain a range hood that meets your specific needs and cooking habits. Remember that proper preparation, attention to detail during installation, and consistent maintenance are the keys to long-term performance and satisfaction. Whether you’re tackling this project yourself or working with a professional, understanding these fundamentals ensures you’ll achieve a bright, fresh kitchen environment where cooking becomes a pleasure rather than a concern about air quality and lingering odors.