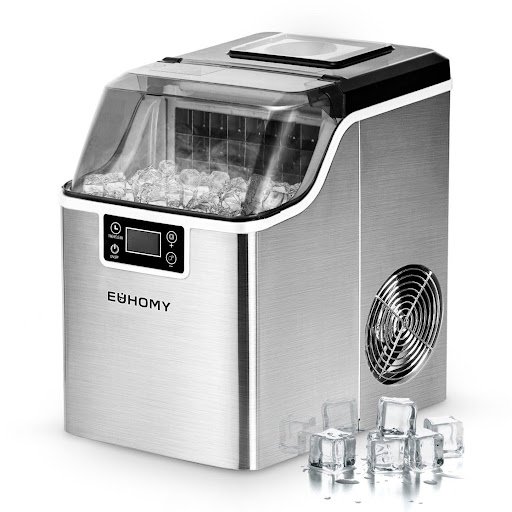
Small portable ice makers have become a game-changer for home users who want fresh ice on demand without the hassle of traditional freezer trays or bulky built-in units. Whether you’re hosting a backyard gathering, keeping drinks cold during a movie night, or simply enjoying the convenience of ice ready in minutes, these compact machines deliver remarkable value in a small footprint.
- Why Regular Cleaning is Essential for Your Portable Ice Makers
- Essential Tools and Supplies for Your Ice Maker Cleaner Kit
- Step-by-Step Guide to Cleaning Your Small Ice Maker
- Pre-Cleaning Preparation and Safety
- Cleaning the Interior and Descaling
- Cleaning the Exterior and Accessible Parts
- Final Rinsing, Drying, and Reassembly
- Maintenance Tips for Your Nugget Ice Maker
- Troubleshooting Common Issues for Efficient Ice Production
- Simple Habits for Long-Lasting Ice Maker Performance
However, many owners overlook one critical aspect of ownership: regular cleaning and maintenance. Over time, mineral deposits from tap water accumulate inside the machine, bacteria can develop in moist environments, and performance gradually declines. The result is slower ice production, odd-tasting cubes, and a machine that works harder than it should. This guide provides a clear, step-by-step approach to keeping your small portable ice maker in peak condition. By investing just a few minutes on routine care, you’ll enjoy consistently fast ice production, better-tasting ice, lower energy consumption, and a machine that lasts for years rather than months.
Why Regular Cleaning is Essential for Your Portable Ice Makers
Every time your portable ice maker runs a cycle, it draws in water that contains dissolved minerals like calcium and magnesium. These minerals don’t evaporate with the water—they cling to internal surfaces, gradually forming a chalky scale that restricts water flow and insulates cooling components. As this buildup thickens, your machine must work harder and longer to produce the same amount of ice, directly undermining the fast ice production you rely on.
Beyond performance, there’s a health dimension that deserves attention. The warm, moist interior of an ice maker creates an ideal breeding ground for mold, slime, and bacteria. Without regular cleaning, these contaminants transfer directly into the ice you consume. You might notice a musty smell or off-putting taste long before visible growth appears, but by that point the problem is well established. For households with children or immunocompromised family members, this concern is especially serious.
The good news is that a simple maintenance cycle—a quick wipe-down weekly, a thorough descaling every two to four weeks, and proper drainage after each use—prevents nearly all of these issues. Consistent care keeps your machine producing crystal-clear ice at full speed while protecting your family’s health and extending the unit’s overall lifespan significantly.
Essential Tools and Supplies for Your Ice Maker Cleaner Kit
You don’t need expensive specialty products to keep your portable ice maker spotless. White distilled vinegar serves as your primary descaling agent—it’s food-safe, effective against mineral deposits, and costs just a few dollars per bottle. Pair it with a soft microfiber cloth for wiping surfaces, a small soft-bristled brush or old toothbrush for reaching tight corners, and warm water for rinsing. A mild dish detergent handles greasy residue on exterior surfaces and the ice basket without leaving harmful chemicals behind.
For deeper cleaning sessions, consider adding a few optional tools to your kit: a spray bottle for applying vinegar solution evenly, a thin bottle brush for cleaning drain plugs or narrow channels, and food-grade citric acid as an alternative descaler for particularly stubborn scale. Always avoid abrasive sponges, steel wool, or harsh chemical cleaners—these scratch internal coatings, damage plastic components, and can leave toxic residues that contaminate your ice. Keeping these simple, affordable supplies together in a small caddy means you’ll never have an excuse to skip a cleaning session.
Step-by-Step Guide to Cleaning Your Small Ice Maker
Pre-Cleaning Preparation and Safety
Before touching any cleaning supplies, unplug your small portable ice maker from the electrical outlet—never work on a powered unit near water. Remove the ice basket and discard any remaining ice, since cubes sitting in a dirty machine may already carry contaminants. Drain all standing water from the reservoir using the bottom drain plug or by carefully tilting the unit over a sink. Set up your workspace on a towel-covered counter with your cleaning supplies within reach, giving yourself room to access all sides of the machine comfortably.


Cleaning the Interior and Descaling
Mix a solution of equal parts white distilled vinegar and warm water—typically two cups of each is sufficient for most compact models. Pour this mixture into the water reservoir until it reaches the fill line. If your machine has a self-cleaning function—a feature found on many popular models from brands like Euhomy—activate it now and let the cycle run completely. If not, power the unit on briefly to circulate the solution through internal water lines for about five minutes, then turn it off and unplug again. Let the vinegar solution sit for an additional ten minutes to dissolve stubborn mineral scale on the evaporator rods and water channels. Using your soft-bristled brush, gently scrub the reservoir walls, the water pump area, and around the ice-forming pins where calcium deposits tend to concentrate. Avoid applying excessive pressure on the evaporator fingers, as these are delicate cooling elements. Drain the vinegar solution completely through the drain plug.
Cleaning the Exterior and Accessible Parts
Dampen your microfiber cloth with warm water and a drop of mild dish detergent, then wipe down the entire outer casing, paying attention to the lid seal where grime and moisture collect. Clean the ice basket separately in the sink with soapy water, scrubbing any sticky residue. If your model has a removable air filter on the side or back panel, rinse it under running water and let it air dry. Don’t forget the area around the drain plug—this spot often harbors mildew that goes unnoticed.
Final Rinsing, Drying, and Reassembly
Refill the reservoir with fresh water and run two complete ice-making cycles, discarding the ice each time to flush any lingering vinegar taste. Dry all accessible surfaces with a clean cloth, reassemble the basket and any removed parts, and your machine is ready for use.
Maintenance Tips for Your Nugget Ice Maker
Establishing a consistent maintenance routine transforms your portable ice maker from a short-lived appliance into a reliable kitchen companion. The most impactful habit is descaling every two to four weeks, depending on your water hardness—if you notice white residue forming on the reservoir walls sooner, shorten that interval. Between deep cleans, drain all remaining water after each use session and leave the lid open for thirty minutes to allow internal surfaces to air dry completely. This single practice dramatically reduces mold and bacterial growth by eliminating the stagnant moisture these organisms need to thrive.
If your model includes a water filter, inspect it monthly and replace it according to the manufacturer’s recommendations, typically every three to six months. A clogged filter forces the pump to work harder, slows ice production, and allows mineral-laden water to bypass filtration entirely. When you won’t be using the machine for a week or more, perform a quick cleaning cycle, drain thoroughly, dry all components, and store the unit with the lid slightly ajar in a cool, dry location. Avoid placing it in garages or sheds where temperature extremes and dust accelerate wear on seals and electronic components. Running filtered or distilled water through the machine instead of hard tap water reduces scale formation substantially, meaning fewer deep cleans and more consistent ice quality over time. These straightforward practices require minimal effort yet deliver measurably faster ice production, better-tasting results, and years of dependable service from your investment.
Troubleshooting Common Issues for Efficient Ice Production
When your portable ice maker starts producing ice slower than usual, the culprit is almost always mineral scale coating the evaporator rods. These deposits act as insulation between the refrigerant system and the water, forcing longer freeze cycles. Running a vinegar descaling session as described earlier typically restores normal production speed within one cleaning. If ice production doesn’t improve afterward, check that the room temperature isn’t exceeding the manufacturer’s recommended operating range—most units struggle in environments above 90°F.
Bad-tasting or cloudy ice points directly to contaminated water or a dirty reservoir. Flush the system with fresh water, clean all internal surfaces, and switch to filtered water if you’ve been using unfiltered tap. For machines producing unusually small or thin ice cubes, verify the water level reaches the fill line—a partially filled reservoir starves the evaporator of adequate water contact. Unusual buzzing or grinding noises often indicate the water pump is straining against debris or scale buildup near the intake. Drain the reservoir, clear any visible particles around the pump inlet, and descale the system. If your machine repeatedly cycles without releasing ice from the evaporator pins, mineral buildup is preventing the cubes from sliding off cleanly. A targeted scrub of the pins with your soft brush and vinegar solution resolves this. Most performance problems trace back to insufficient cleaning frequency, so adjusting your maintenance schedule is the simplest long-term fix.
Simple Habits for Long-Lasting Ice Maker Performance
Keeping your small portable ice maker clean and well-maintained doesn’t require professional expertise or expensive products—just consistency and a few minutes of attention on a regular schedule. The core routine is straightforward: wipe down surfaces weekly, descale with a vinegar solution every two to four weeks, drain standing water after each use, and allow the interior to air dry before closing the lid. These habits prevent mineral buildup from choking performance, stop mold and bacteria before they compromise your ice quality, and keep every component running smoothly.
When issues do arise—slower production, off-flavors, or unusual sounds—the fix almost always connects back to cleaning frequency. Adjusting your maintenance schedule based on how often you use the machine and how hard your water is will resolve most problems before they escalate into costly repairs or premature replacement. By treating your portable ice maker as the food-contact appliance it truly is, you’ll be rewarded with crystal-clear, fresh-tasting ice produced quickly and efficiently for years to come. Make these simple practices part of your kitchen routine, and your compact ice maker will continue delivering the convenience that made it worth owning in the first place.