Creating whiteboard videos has become a powerful method for educators, trainers, and content creators to deliver clear, visual explanations. Whether you’re a YouTuber explaining math concepts or a corporate trainer recording tutorials, whiteboard videos offer a dynamic and engaging way to present information.
- Why Does Glare Appear in Whiteboard Videos?
- The Role of Surface Type: Choose the Right Whiteboard
- Lighting Tips to Eliminate Whiteboard Glare
- 1. Avoid Direct Lighting
- 2. Use Softboxes or Diffusers
- 3. Experiment with Light Placement
- 4. Use Natural Light Cautiously
- 1. Use an Angle
- 2. Adjust Camera Height
- 3. Use a Polarizing Filter
- Use Matte Markers for Maximum Visibility
- Use Anti-Glare Whiteboard Films
- Upgrade to Video-Friendly Whiteboard Technology
- Use Screen Capture or Digital Whiteboard Alternatives
- Real-Life Setup Tips from SF Creators
- Common Mistakes That Cause Glare in Whiteboard Videos
- Final Thoughts:
That annoying shine or reflection that appears on camera can make text hard to read and visuals difficult to see. If you’re serious about making high-quality whiteboard videos, eliminating glare should be a top priority.
Why Does Glare Appear in Whiteboard Videos?
To fix a problem, you need to understand it. Glare is caused when light reflects off the shiny surface of a whiteboard and enters the camera lens directly. This reflected light overpowers the camera sensor in specific areas, leading to washed-out or overly bright spots.
The two main causes of glare are:
- Shiny whiteboard surfaces (especially glass or low-quality melamine boards).
- Improper lighting and camera positioning which causes lights to bounce directly into the lens.
Since most whiteboards are designed for visibility in rooms, not for video recording, it’s easy to run into glare issues if you’re not careful with setup.
The Role of Surface Type: Choose the Right Whiteboard
The type of whiteboard you use has a huge impact on how much glare you’ll have to deal with. Here’s what to consider:
1. Melamine Whiteboards
These are the cheapest and often come with a glossy surface. Unfortunately, they are also the worst for filming because they reflect light easily. If you’re using a melamine board and struggling with glare, it’s probably time for an upgrade.
2. Porcelain or Ceramic Whiteboards
These are more durable and often have a matte finish that reduces glare. They’re a better option for filming and also resist staining and ghosting.
3. Glass Whiteboards
While sleek and modern, glass whiteboards are highly reflective and notorious for producing glare. Unless you’re using specialized anti-glare lighting and positioning, avoid glass boards for whiteboard videos.
4. Smart Whiteboards
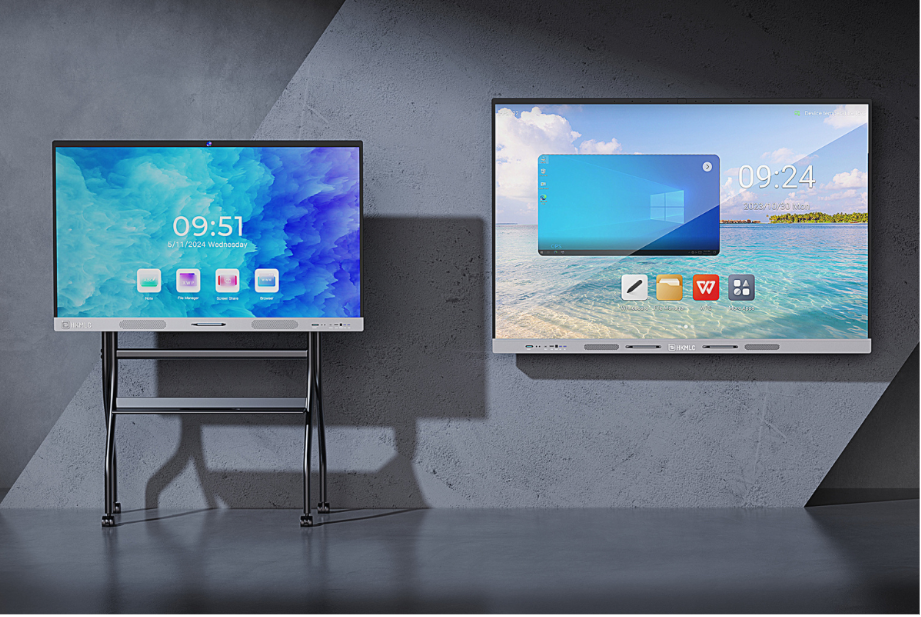
Advanced options like the HKMLC Digital whiteboard are engineered with camera-friendly surfaces, offering low-reflectivity and high contrast. These boards are built with video production in mind, making them ideal for both educators and creators who regularly record lessons or tutorials.
Lighting Tips to Eliminate Whiteboard Glare
Lighting is perhaps the most critical factor when it comes to reducing glare. Even the best whiteboard can produce reflections if it’s not lit correctly.
1. Avoid Direct Lighting
Do not point lights directly at the whiteboard. This is the number one cause of glare. Instead, use indirect or diffused lighting techniques.
2. Use Softboxes or Diffusers
Softboxes and light diffusers spread light evenly and minimize harsh reflections. Position them to the side of your whiteboard at a 45-degree angle to avoid shining light straight onto the surface.
3. Experiment with Light Placement
Sometimes it takes trial and error to find the perfect setup. Try placing lights above or beside the whiteboard rather than in front of it. Overhead lights should be angled or dimmed if they create hotspots on the board.
4. Use Natural Light Cautiously
While natural light looks great on camera, it can also create unpredictable glare. If you use natural light, try filming at times of day when the sun is indirect, and diffuse it with curtains or sheer blinds.
Camera Placement: The Secret Weapon Against Glare
Even if your lighting is on point, poor camera placement can introduce glare into your video. Here’s how to position your camera to eliminate reflections:
1. Use an Angle
Don’t place your camera directly in front of the whiteboard. Instead, shoot at a slight angle (between 10–30 degrees off-center). This small change can make a massive difference in minimizing reflections.
2. Adjust Camera Height
Position the camera slightly higher or lower than the center of the whiteboard. This changes the angle of reflected light and can help bypass glare spots.
3. Use a Polarizing Filter
If you’re using a DSLR or mirrorless camera, invest in a polarizing lens filter. This tool reduces glare and reflections by blocking certain light waves. It’s a favorite trick of professional videographers.
Use Matte Markers for Maximum Visibility
Believe it or not, your choice of markers also affects glare and visibility on camera. Shiny markers may reflect light, especially when the ink is still wet. Instead, opt for:
- Matte finish dry-erase markers
- Bold, dark colors like black, blue, or green
- Thicker tips for better camera readability
Avoid red or yellow markers unless your lighting and camera setup make them easy to read. Also, clean the whiteboard thoroughly before each recording session to avoid smudges that can catch the light.
Use Anti-Glare Whiteboard Films
If you’re stuck with a glossy whiteboard, one clever hack is to apply anti-glare film over the surface. These films reduce shininess and offer a more matte texture that’s better for video.
Just be sure the film is bubble-free and properly aligned. A poorly applied film can create uneven surfaces and cause other visual distractions.

Upgrade to Video-Friendly Whiteboard Technology
While you can mitigate glare through camera and lighting tricks, the most straightforward solution is to use whiteboards designed for video recording. These often come with:
- Matte, non-reflective surfaces
- High-contrast backgrounds
- Compatibility with digital overlays or screen capture
The HKMLC Interactive whiteboard is one example of a product that blends traditional whiteboarding with modern tech. It not only reduces glare with its special low-reflective surface but also allows you to capture and broadcast your writing digitally in real-time. This is incredibly useful for remote teaching, live-streaming tutorials, and creating online course content.
By combining smart features with superior design, it solves many common filming issues and enhances the viewer experience.
Use Screen Capture or Digital Whiteboard Alternatives
Another method to avoid glare completely is to skip physical boards and use digital whiteboards. Tools like:
- Microsoft Whiteboard
- Jamboard
- Miro
- OpenBoard
…allow you to draw, write, and present content digitally while screen recording the session. This offers perfect clarity, zero reflections, and flexible editing. These tools are perfect for creators working entirely in digital environments.
However, if your teaching or presenting style relies on in-person writing, a physical whiteboard with an optimized filming setup is still the preferred route.
Real-Life Setup Tips from SF Creators
Filmmakers and educators in San Francisco, a hub for creative professionals, often deal with space and lighting challenges. Here are some locally tested tips:
- Use track lighting with dimmers to fine-tune brightness.
- Rent or borrow studio lighting kits from coworking spaces like SF’s Workshop Cafe or TechShop.
- Install a matte background wall behind your whiteboard to reduce contrast glare.
- Mount the whiteboard near a north-facing window to harness indirect daylight with minimal glare.
Common Mistakes That Cause Glare in Whiteboard Videos
To wrap up, let’s highlight some of the most frequent mistakes people make when filming whiteboard videos:
- Using glossy or glass whiteboards
- Shining direct light on the board
- Positioning the camera directly in front
- Using shiny or low-contrast markers
- Ignoring reflections from nearby windows or shiny walls
By avoiding these mistakes and implementing the tips in this article, you’ll dramatically improve the visual clarity and professionalism of your whiteboard videos.

Final Thoughts:
Glare is one of the most frustrating challenges when filming whiteboard videos, but it’s also one of the most solvable. By choosing the right whiteboard surface, adjusting your lighting and camera angles, and using professional equipment when necessary, you can produce sharp, clear, and glare-free videos every time.
Whether you’re a classroom teacher, online tutor, or video content creator, investing time in the right setup will elevate the quality of your recordings and enhance your audience’s learning experience.
If you want a seamless blend of analog writing and digital clarity, upgrading to a tool like the HKMLC Smart whiteboard can be a game-changer. But even with a standard whiteboard, a few smart filming techniques can go a long way.


