Within the realm of gaming material, in-game walkthroughs and tutorials rank among the most beneficial tools available to players. Whether you are helping someone navigate a difficult quest, defeat a difficult boss, or find a hidden Easter egg, your ability to create clear, high-quality training videos can make a big difference. Having the appropriate screen-capturing tool is crucial for that.
- What is iTop Screen Recorder?
- Why Use iTop Screen Recorder for Gaming Tutorials?
- 1. High-Performance Game Mode
- 2. System and Microphone Audio Support
- 3. Webcam Overlay
- 4. Built-in Editor
- How to Record In-Game Tutorials with iTop Screen Recorder
- Step 1: Download and Install iTop Screen Recorder
- Step 2: Choose Game Interface
- Step 3: Configure Recording Settings
- Step 4: Record Your Walkthrough
- Editing Your In-Game Tutorial
- Exporting and Sharing
- Tips for High-Quality In-Game Tutorials
- 1. Use a Script or Outline
- 2. Check System Performance
- 3. Monitor Audio Quality
- 4. Keep Videos Concise
- 5. Add Visual Cues
- Final Thoughts
One such program that has rapidly become well-liked by gamers and multimedia producers is iTop Screen Recorder. Without sacrificing speed, it offers a simple yet efficient way to record gameplay video. We’ll look at how to record, edit, and post high-quality in-game tutorials and walkthroughs with iTop Screen Recorder in this guide.
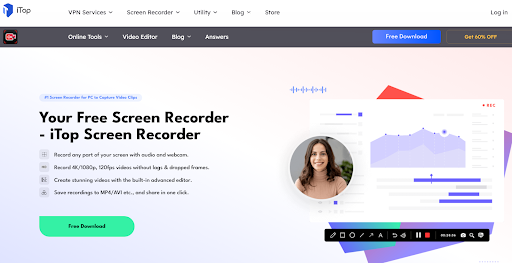
What is iTop Screen Recorder?
iTop created the free and portable screen recording program known as iTop Screen Recorder. It is well-renowned for its user-friendly interface and minimal CPU utilization, and it is made for Windows users. With the recorder, users can record high-quality video with webcam overlay and audio. It works especially well for streaming media, capturing online meetings, and—above all—gaming. Among its notable characteristics are:
- Record any part of your screen with audio and webcam
- Record Webcam with Virtual Background
- Integrated video editor for simple edits
- Record 4K/1080p, 120fps videos without lag & dropped frames.
- Support for simultaneously recording the microphone and system sound
- Save recordings to MP4/AVI etc., and share in one click.
Why Use iTop Screen Recorder for Gaming Tutorials?
Consistency, clarity, and video quality are important considerations when making tutorials or walkthroughs. iTop Screen Recorder is unique for the following reasons:
1. High-Performance Game Mode
Even during graphically demanding action, iTop Screen Recorder’s game mode is specifically tuned to minimize CPU and GPU burden, which lowers lag and guarantees smoother recording. This is essential for uninterrupted real-time game video recording.
2. System and Microphone Audio Support
You can use the tool to record your own voice and in-game sounds using a microphone. For walkthroughs and tutorials, where viewers are assisted in understanding the procedures through commentary and explanation, this is crucial.
3. Webcam Overlay
You can add your face to the video to make it more interesting and intimate. You can appear in the video while narrating your actions thanks to iTop Screen Recorder’s support for webcam overlays.
4. Built-in Editor
After the recording is complete, you can edit your video using the built-in editor to clip, trim, and comment on it without exporting it to another program. This facilitates quicker content delivery by accelerating the editing process.


How to Record In-Game Tutorials with iTop Screen Recorder
Follow the steps below to successfully capture your gameplay and turn it into a compelling tutorial or walkthrough.
Step 1: Download and Install iTop Screen Recorder
- Visit the official iTop website.
- Install the free version on your Windows computer after downloading it.
- Open the application when it has been installed.
Step 2: Choose Game Interface
- Click the game, and you can see a series of settings.
- When you set well, you can select your game. iTop will identify your game in the background if it is running.
Step 3: Configure Recording Settings
Setting up your preferences is crucial before you begin recording.
Video Settings:
- Resolution: Depending on your system and intended platform, select from 720p, 1080p, or 4K.
- Frame Rate: For fluid playing, choose between 90 and 60 frames per second.
Format: For global compatibility, select MP4.
Audio Settings:
The audio configuration outlined above utilizes the AAC (Advanced Audio Coding) format, which efficiently delivers high-quality sound at a bitrate of 128 Kbps. This bitrate strikes a balance between clarity and file size, making it ideal for streaming and digital distribution.
Hotkeys:
- For simpler control while playing, set hotkeys for Start/Stop(Ctrl + F9), Pause/Resume(Ctrl + F10), and Screenshot(Ctrl + F11).
Step 4: Record Your Walkthrough
- Start the game you wish to capture.
- To start recording, press the hotkey or click the “REC” button.
- Talk clearly and follow your tutorial instructions as you play.
- Steer clear of distractions and extraneous background noise.
- When you’re done, hit the designated hotkey or Stop button.
The recording will be immediately saved by iTop to the output folder of your choice.
Editing Your In-Game Tutorial
Your raw video may require some editing once it has been recorded. For this, iTop Screen Recorder comes with a simple yet powerful video editor.
Basic Edits:
- Remove any extraneous parts at the start or finish.
- Eliminate any blunders or stops in the middle.
- For clarity, include callouts or text annotations.
Advanced Edits:
- If necessary, play some background music.
- Blur sections of the screen or critical information.
- To balance voice narration and game sound, adjust the audio levels.
The editor is easy to use and appropriate for making last-minute changes prior to publication.
Exporting and Sharing
After editing is finished, you can export the video in the format and resolution of your choice.
- Select the quality, frame rate, and export resolution.
- Either save the movie to your local drive or post it straight to social media, YouTube, or Twitch.
To keep viewers interested, make sure your tutorial has a title screen, a chapter breakdown, and a closing statement.
Tips for High-Quality In-Game Tutorials
Take into account the following advice to get the most out of iTop Screen Recorder and produce content of a high caliber:
1. Use a Script or Outline
Having a script guarantees that you cover every topic and prevent misunderstandings, even if you are an experienced player.
2. Check System Performance
Close any unused background apps before beginning a lengthy recording session to free up additional system resources for the game and recorder.
3. Monitor Audio Quality
Make sure your voice is clear and heard above the game sound by testing your microphone setup before recording.
4. Keep Videos Concise
Try to keep each instruction focused on a particular objective or problem, unless it’s a comprehensive walkthrough. Audiences respond better to brief, targeted material.
5. Add Visual Cues
To make it easier for viewers to follow along, highlight important activities in the editor with annotations or visual markers.
Final Thoughts
A great tool for players who wish to produce and distribute top-notch in-game walkthroughs and tutorials is iTop Screen Recorder. It is accessible for novices and provides sufficient control for seasoned artists due to its low system impact, versatile recording options, and integrated editing functions.
You can begin creating lessons that benefit other players and establish your credibility as an informed and reliable developer of gaming content by following the instructions in this guide.
Start recording your first walkthrough right now by downloading iTop Screen Recorder from the official website.