Acrylic is one of the most widely used materials across industries that value durability, light weight, and exceptional optical clarity. From retail displays and protective barriers to medical devices and prototype parts, acrylic delivers a glass-like appearance with added strength and flexibility. However, getting pristine, clear results from cnc machining services isn’t as simple as loading the sheet and pressing “start.”
Acrylic can be temperamental when machined—it’s prone to melting, cracking, chipping, and clouding if handled incorrectly. If you’re not paying close attention to tooling, feeds, speeds, and finishing techniques, the result can fall far short of your expectations.
Whether you’re producing signage, custom enclosures, lighting components, or high-end visual prototypes, here are the essential tips and techniques you need to machine acrylic with perfect clarity—every time.
1. Choose the Right Acrylic Grade
First things first: not all acrylic is the same. One of the most common mistakes is assuming that cast and extruded acrylic perform the same under CNC machining— they don’t.
- Cast acrylic is made by pouring liquid acrylic into molds, resulting in a more uniform molecular structure. It’s harder, more scratch-resistant, and better suited for CNC cutting. Most importantly, it machines cleaner, with less risk of melting or edge chipping.
- Extruded acrylic is cheaper and more readily available, but it’s softer and reacts poorly to the heat generated during cutting. It’s more prone to gumming up tools, producing cloudy edges, and even cracking.
If your goal is crystal-clear finishes and polished edges, always start with cast acrylic. The higher upfront cost pays off in dramatically better results and less post-processing.
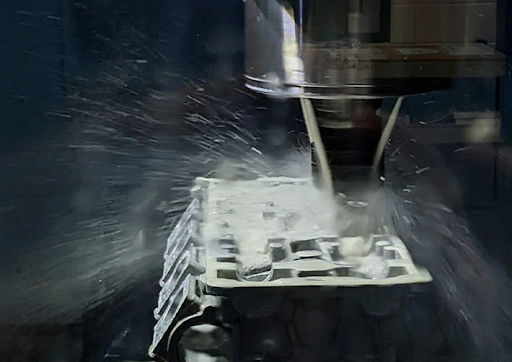
2. Optimize Speeds and Feeds to Reduce Heat
One of the biggest challenges in machining acrylic is managing heat. When acrylic gets too hot, it doesn’t just warp—it melts, causing poor edge quality, chip welding, and surface clouding.
Here’s how to get clean cuts without overheating:
- Keep spindle speeds moderate. Aim for 10,000 to 18,000 RPM depending on the tool size. Higher speeds create too much friction.
- Use conservative feed rates. You want to keep the tool moving steadily without lingering in one spot. A moderate feed rate prevents excessive friction and heat buildup.
- Employ climb milling. This technique—where the tool moves in the same direction as the material feed—reduces chipping and delivers a cleaner edge.
- Take shallow passes. Rather than trying to hog out a lot of material at once, go slow and steady. Deep passes build heat and increase the risk of cracking.
Proper chip evacuation and tool path strategy are essential to avoid friction-related problems. Always monitor the cutting area and adjust on the fly when needed.


3. Use Sharp, Purpose-Built Cutting Tools
Your results will only be as good as your tooling. Acrylic dulls tools quickly, and dull bits don’t just lose precision—they cause melting, edge tearing, and surface haze.
Stick to these guidelines:
- Use single-flute or double-flute end mills. Fewer flutes mean better chip clearance and lower heat buildup.
- Up-cut spiral bits are ideal for lifting chips out of the cut path, helping keep the acrylic cool and smooth.
- Choose polished carbide tools, or tools with a mirror-like finish, designed specifically for plastic. These create less friction and resist heat-related damage.
- Avoid tools made for metal. Acrylic behaves very differently and requires dedicated plastic-cutting geometry.
Regularly inspect your tools for wear, and replace them often. It’s a small cost that prevents big problems.
4. Control Vibration and Secure the Workpiece
Acrylic is brittle. Even with perfect feeds and speeds, vibration can ruin your cut. Chatter leads to edge cracking, ghosting, and uneven surface finishes.
To minimize vibration:
- Secure the sheet with clamps, a vacuum table, or double-sided tape. The goal is zero movement during the cutting process.
- Use a sacrificial layer underneath your sheet to help support the material and reduce tool breakout on through-cuts.
- Reduce tool stick-out to increase rigidity.
- Double-check that your CNC router or mill is level and vibration-free. Even small machine wobbles can show up on your part.
Avoid overtightening clamps, which can dent the material and leave stress marks that appear during cutting.
5. Use Proper Cooling and Chip Control
The best way to prevent acrylic from melting is to manage the chips and temperature during the cut.
You’ve got a few cooling options:
- Compressed air is the most popular. It blows chips out of the way and helps cool the tool and workpiece.
- Water-based coolants can be used in mist or flood setups, but beware: acrylic absorbs moisture. You’ll likely need to dry the parts afterward.
- Avoid oil-based coolants—they leave residue and can chemically react with the acrylic, causing surface hazing or cracking.
Make sure chips are evacuated from the cutting path quickly. If they’re allowed to re-cut, they’ll heat up the material and leave burn marks or haze.
6. Polish for Optical Clarity After Machining
Even with perfect machining, some parts need post-processing to get that glass-clear look. Here are the best finishing options:
- Flame polishing: Pass a low-intensity flame (such as from a hydrogen torch) over the edges. This slightly melts the surface, smoothing it into a glossy finish. Be cautious—overheating can warp the part.
- Diamond polishing: For flat edges, diamond-tipped tools can grind and polish simultaneously. This method delivers the clearest, most consistent results.
- Micro-mesh pads and buffing compounds: Ideal for removing fine scratches or giving faces a mirror-like finish. Work your way up through finer grits for best results.
Always clean parts thoroughly after finishing to remove dust, polish residue, or moisture.
Conclusion: Clarity Comes From Control
Acrylic machining is as much art as science. To get perfect optical clarity, you need to control every variable: material type, tool geometry, cutting parameters, chip evacuation, and post-processing. Rushing any one of these steps usually results in cloudy edges, melted corners, or cracked sheets.
The good news? Once your process is dialed in, CNC-machined acrylic can look indistinguishable from molded parts—crystal-clear, high-gloss, and dimensionally precise.
If you’re producing critical components or high-visibility products, don’t leave it to chance. Partnering with an experienced CNC shop that understands acrylic machining can save you time, reduce waste, and deliver top-tier results the first time.