
Introduction to Dnd Miniatures
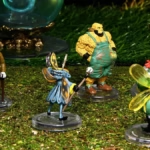
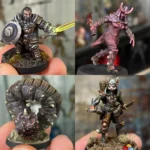
Dungeons & Dragons has captivated players for decades, bringing imagination and adventure to life. At the heart of this epic game are DnD miniatures—tiny representations of your characters and monsters that add depth to every campaign. Picture a vivid battlefield with intricately crafted figures, each telling its own story as they clash in combat or embark on quests.
- Introduction to Dnd Miniatures
- Benefits of Using Miniatures in Dnd
- Materials Needed for Creating Miniatures
- Step 1: Choosing Your Miniature Scale
- Step 2: Choosing Your Materials
- Step 3: Sketching and Planning Your Miniature Design
- Step 4: Sculpting or Assembling Your Miniature
- Step 5: Painting and Detailing Your Miniature
- Tips and Tricks for Creating
Using miniatures elevates gameplay from mere storytelling to an immersive experience where creativity knows no bounds. Whether you’re a seasoned dungeon master or new to the world of tabletop RPGs, crafting your own miniatures can be both rewarding and fun. This step-by-step guide will walk you through everything you need to know about creating stunning DnD miniatures that bring your adventures alive!
Benefits of Using Miniatures in Dnd
Using miniatures in Dungeons & Dragons elevates the gaming experience. They provide a tangible representation of characters and monsters, making encounters feel real and immersive.
Miniatures help players visualize the battlefield. This clarity enhances strategy and decision-making during gameplay. When everyone sees their positions clearly, it fosters better teamwork.
Additionally, they spark creativity. Painting or customizing miniatures allows for personal expression. Each player can create unique representations of their characters, adding depth to storytelling.
Another advantage is engagement. Miniatures draw attention and keep players invested in the game world. The physical presence of these figures makes every session more interactive and enjoyable.
They serve as conversation starters among gamers. Sharing tips about painting techniques or miniature selections creates bonds within the community while enriching social interactions around the table.
Materials Needed for Creating Miniatures
Creating your own DnD miniatures can be an exciting adventure. The right materials will set you up for success.


Start with a solid base. Plastic or resin is popular, but foam and wood also work wonders. Each offers different textures and durability.
For details, consider using polymer clay or air-dry clay. These materials are malleable and easy to shape into intricate designs.
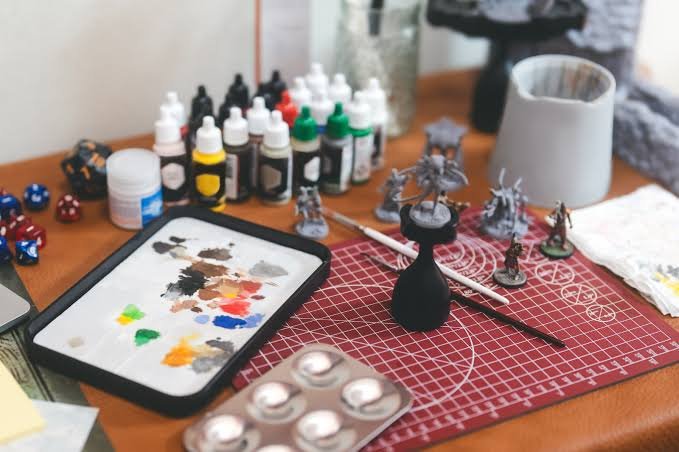
Don’t forget tools! A sharp craft knife, sculpting tools, and fine-grit sandpaper will help refine your miniature’s form.
Paints are essential too. Acrylic paints provide vibrant colors that bond well to various surfaces. Pick up some brushes in different sizes for precise detailing.
Have a clear sealant on hand. This protects your masterpiece from wear while enhancing the shine of the paint finish. With these materials ready, you’re one step closer to bringing your characters to life!
Step 1: Choosing Your Miniature Scale
Choosing the right scale for your DnD miniatures is crucial. It sets the tone for your game and enhances the overall experience.
Common scales include 28mm, 32mm, and even larger sizes like 54mm. Each scale has its advantages, depending on how detailed you want to get or how much space you have on the table.
If you’re playing with friends who use specific scales, it’s smart to align with them. This way, all miniatures fit seamlessly during gameplay.
Consider your personal style too. Smaller scales allow for intricate details but can be challenging to paint. Larger figures are easier to handle and offer a more dramatic presence at the gaming table.
Choose what resonates with you and fits within your game’s aesthetic!
Step 2: Choosing Your Materials
Selecting the right materials for your DnD miniatures is crucial. The choice can influence both the quality and look of your final piece.
Plastic, resin, and metal are popular options. Plastic is lightweight and often easier to manipulate. It’s a great starting point for beginners. Resin offers finer details but requires more skill in handling due to its brittleness.
Consider also using clay or foam for sculpting unique designs from scratch. These materials allow greater creativity but might need additional tools.
Don’t forget about paints and sealants! A good acrylic paint set will bring your miniature to life. Sealants protect your hard work from wear and tear during gameplay.
Research various brands before making a purchase—quality matters when it comes to achieving that perfect finish on your masterpiece!
Step 3: Sketching and Planning Your Miniature Design
Sketching your miniature design is an exciting part of the creative process. It transforms ideas from your mind into tangible visuals.
Begin by gathering inspiration. Look at fantasy art, existing miniatures, and character descriptions in your campaign. This will help you visualize unique features that set your character apart.
Next, grab some paper and a pencil. Start with basic shapes to outline the form of your miniature. Don’t worry about details just yet; focus on proportions first.
Once satisfied with the overall shape, refine it further. Add specific elements like armor designs or weapon types that reflect their personality or backstory.
Consider functionality too—ensure the pose allows for stability when painted and displayed. Sketch multiple angles if needed; this can guide you during sculpting or assembly later on in the project.
Step 4: Sculpting or Assembling Your Miniature
Now comes the fun part: bringing your vision to life through sculpting or assembling your miniature. If you’re working with a kit, carefully follow the instructions provided. Each piece should fit together seamlessly, so take your time.
For those opting to sculpt from scratch, start by shaping your base form using clay or another malleable material. Focus on getting the proportions right before adding details.
Use tools like sculpting knives and brushes for finer work. These can help create texture and depth in armor or skin features that make your character pop.
Don’t be afraid to experiment! Sometimes an unexpected twist can lead to a unique design that stands out on the table.
Remember, patience is key during this phase. Take breaks if needed—sometimes stepping away helps spark new ideas for detailing later on.
Step 5: Painting and Detailing Your Miniature
Painting your DnD miniatures is where they truly come to life. This step allows you to add personality and depth, transforming a simple figure into a vivid character.
Start with a clean surface. Wash the miniature with warm, soapy water to remove any oils from handling. After drying, apply a base coat using spray paint or brush-on primer for better adhesion.
Next, choose your color palette wisely. Use light layers of acrylic paints to build up colors gradually. Thin your paint slightly for smoother application and avoid obscuring fine details.
Don’t forget shading and highlighting! A wash can enhance crevices while dry brushing adds dimension on raised areas. Consider using washes for quick effects in shadows.
Seal your masterpiece with varnish—matte or glossy depending on your desired finish—to protect it from wear during gameplay. Your painted miniature will be ready to take center stage at the table!
Tips and Tricks for Creating
When it comes to creating your own DnD miniatures, a few tips can elevate your crafting experience. First, patience is key. Don’t rush through the sculpting or painting process; take your time to get each detail just right.
Use reference images for accuracy. Whether you’re basing your design on existing characters or inventing new ones, visuals will help guide you through proportions and details.
Experiment with different techniques and materials as well. For instance, if you’re using clay for sculpting, try various tools like dental picks or fine brushes for texture.
Try dry brushing when painting. This technique adds depth without overwhelming the original color scheme—perfect for highlighting armor textures or fur.
Don’t hesitate to practice on test pieces before diving into your main miniature project. It’s a fantastic way to refine skills and avoid mistakes that could set back more detailed work.
Join online communities focused on DnD miniatures creation. Sharing experiences and getting feedback can inspire you while also providing added support along the journey of crafting memorable game pieces.
With these tips in mind, you’ll find yourself well-equipped to create stunning DnD miniatures that enhance gameplay and bring stories to life at the tabletop!